Description
Product details
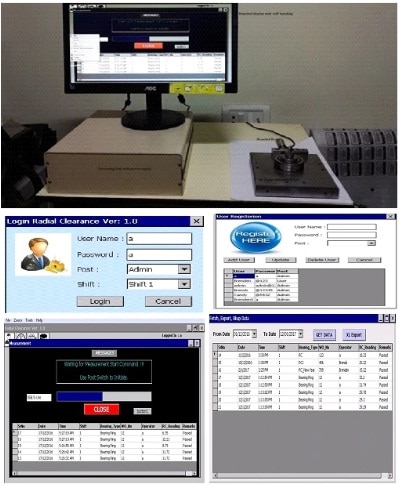
TALYROND 252 –RETROFIT SPECIFICATIONS.. FOR SALE Note*-Machines displayed are Products/property of respective Manufactures. Machine Pictures used are to state compatibility of our Retrofit Packages only. A. MESUREMENT CAPACITY 1. Maximum diameter : 350 mm (13.8 in) optionally(also see Para 9) extendable to 500 mm (19.7 in)2. Maximum Weight : 20 kg (44.1 lb)3. Maximum Height of assessable Surface : 300mm (11.8 in)4. Worktable Moment Loading : 120 kgmm (10.4 lbin)5. Maximum Eccentricity : 25mm (0.98in) along the load line B. WORKTABLE AND SPINDLE 1. Worktable Diameter :190mm (7.5 in)2. Speed of Rotation : 6 rpm nominal, clockwise3. Range of Centering Nominal : ±1mm (±0.04in)4. Range of Leveling Nominal : ±4.1 mrad (±14 arc minutes)5. Height of neutral plane above Worktable : 20mm (0.79in)6. Roundness Limit of Error : Concentric Load 20kg (44.1 lb)(Departure from the least within 0.06 µm 0.0003µm/mmSquares circle at 6 rpm with height above worktable 0-50 u.p.r filter) (1.5 µin 0.3 µin/in)*7. Axial Error : 0.15µm (3.9 µin) maximum axial movement of worktable during one revolution. *These departures may be inwards and outwards C. VERTICAL STRAIGHTNESS UNIT 1. Measurement Length : 300 mm (11.8in),2. Accuracy of stop Measurement : 0.5mm (0.02in)3. Speed of Traverse (for set-up) : (1) Joystick slow speed0-3mm/s (0-0.12 in/s) for approx 70% of joystick travel. (2) Computer controlled <3 mm/sec variable.4. Straightness limit of Error : In the measuring plane: (Minimum zone straightness at 1µm over 300 mm (40µin 1mm/sec (0.04 in/sec) with over 11.8in) 8.0mm (0.3in) cut off low pass filter5. Positional Control Uncertainty : ±100µm (±0.004in) for one single move.6. Internal Capacity : 150mm (5.9in) For Straightness Limiting conditions, Maximum length of continuous Minimum diameter clearance Internal surface that can be assessed 115mm (4.5in) depth in bores larger thanØ25mm (Ø1in)7. For Roundness assessment Internal bore penetration : 150mm (5.9in), 115mm depth in bore of Ø25mm ***Internal penetration for other than ‘limiting condition’ depends on component geometry. D. RADIAL STRAIGHTNESS UNIT1. Traverse Length : 200mm (7.9in) This may be set for up to 50mm (1.97in) of travel past the spindle axis. Standard setting is 25mm past the spindle axis.2. Speed of Traverse : up to 2mm/sec3. Positional control uncertainty : ±50µm (±0.002in) for one single move.This is for both relative and absolute movements. E. GAUGE1. Standard Stylus Arm Length : 75mm (2.95”) effective length2. Range of Gauge movement with80mm Stylus Arm : 1.2mm (0.079in) Nominal F. ELECTRICAL SUPPLY Main Instrument Overall Weight : 279kg (615lbs) Overall Length : 760mm (29.9in) Overall Width : 760mm (29.9in) Overall Height : 1513mm (59.6in)2.


