Preview

This is your website preview.

Currently it only shows your basic business info. Start adding relevant business details such as description, images and products or services to gain your customers attention by using Boost 360 android app / iOS App / web portal.

SALBROENGINEERS 5954e9473576cd05187e322f Products https://www.salbroengineers.com
surface roughness
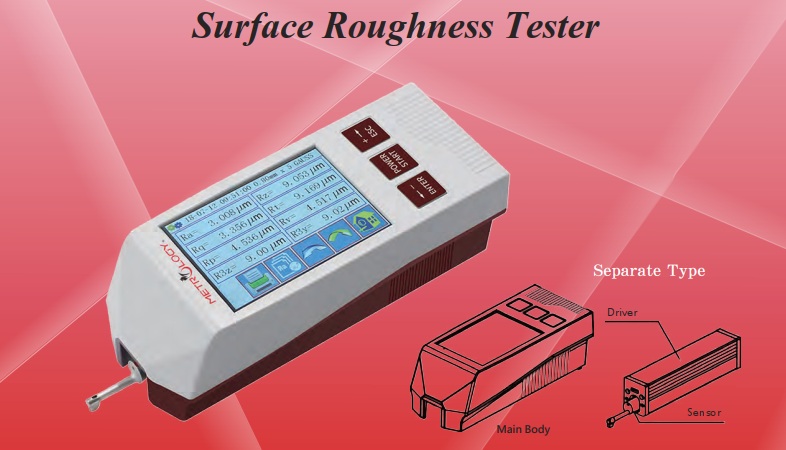
RT90G roughness tester is unique in its category because it features a built-in calculation unit and measurement procedure, thus being the first ''All-in-one’’ roughness tester. Extremely compact and easy to handle, it conveniently allows positioning also on large size pieces, thanks to built-in micrometrics with 100 mm range. The shiny 3.7’’ colour touchscreen display combined to the icon interface, allows the operator to set the measurement parameters, moving on the piece and carrying out the analysis quickly. The results obtained and the relative tolerances are immediately displayed and can be downloaded on PC or printer using the external printer. The internal reference allows to perform analyses also on W waviness parameters, while the bistable pick-up holder allows measuring with one simple gesture, with or without skid, as required.CHARACTERISTICS:Measurement range:	±500μmResolution	0,001 μmCut-off lenght	0,25 – 0,8 - 2,5 mmCut-off number	Selectable from 1 to 19Traverse lenght:            	Up to 50 mmPick-up:	Inductive, it can be rotated of 90° for lateral measurementsMeasurement parameters    	54 parameters(Ra, Rq, Rt, Rz, Rp, Rc, Rv, Rsk, Rku, Rsm, Rdc, RPc, Pa, Pq, Pt, Pp, Pc, Pv, Psm, Pdc, PPc, Wa, Wq, Wt, Wz, Wp, Wv, Wc, WSm, Wdc, WPc, Rk, Rpk, Pvk, Mr1, Mr2, Pt, Pdc, PPc, R, Rx, AR, Wte, W, AW, Wx, Rke, Rpke, Rvke, Mr1e, Mr2e Rmax, R3z, R3zm)Graphs displayed:	Roughness, waviness, primary, total, bearing capacity curve, and distribution of ordinates.Unit of measurement:  	Millimeters and inchesInterface:TFT, 3.7'' colour graphic Touchscreen display and 3 waterproof membrane buttonsLanguages: 	Italian, French, English, German, Spanish and     PortugueseMemory: 	Up to 1000 measurementsAccessories:	RT90G roughness tester with SB10/60 pick-up, 110-230V battery charger, roughness sample, Case, User manual.
RT90G Portable Surface Roughness

INR 1

VIEW DETAILS
Contact us for Roughness Measurements to be performed on your components.SeSurf Roughness Analysis software provides 22 different Unfiltered Profile parameters, 26 Roughness and Waviness parameters.
Surface Roughness Measurement Services

INR 1

VIEW DETAILS
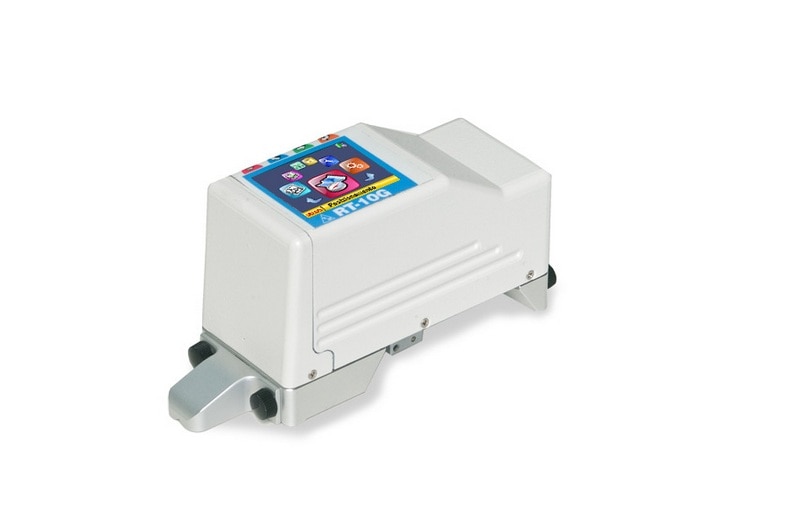
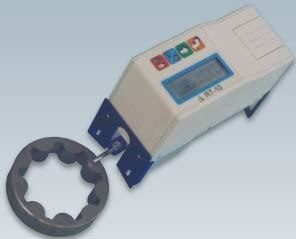
Palmtop Roughness Tester RT-10 Plus•	Technical specification•	Roughness parameters according to ISO 4287: Ra, Rq, Rt, Rz, Rc, RSm, Rmr & Rmax Special.•	4 roughness parameters according to ISO 12085: Pt, R, AR, Rx. Measuring length: up to 16 mm.•	Measurement range: ±20 µm and ±80 µm.•	Cut-off lengths: 0.25 – 0.8 – 2.5 mm.•	Gaussian filter according to ISO 11562.•	Display: 16-character, 2-line LCD.•	Touch keyboard of 4 keys.•	Rechargeable battery incorporated.•	Multi language: Italian, French, English, German and Spanish.•	Buffer of 30 measurements.•	Serial data output.•	Gauge rotable through 90° for lateral measurements.•	Resolution 0.01 µm and 0.04 µm.The portable, palmtop roughness tester RT-10 permits evaluation of the most varied roughness parameters directly on the site of production offering, in a compact package, the advantages of being easy to carry, simple to use and reliability of measurement.Designed for use on the shop floor, it is shielded against external agents by a special protective membrane. It can measure in difficult positions, including when held in the hand, in the vertical traverse position. The gauge may be turned by 90° to permit measurements in grooves or between shoulders. The 400x250 mm measurement support in black granite with adjustable steel column can be used with RT-10 to measure pieces that are bulky or difficult to position.Complete Presentation of ResultsThis instrument can be connected to the PR-10, a 24-column printer providing certification both of the parameters measured, together with indication of the tolerances, and of the profile drawing. Using the serial output line, data can be downloaded to a Personal Computer running the Remote-10 program under Windows 98/ME/NT4/2K, XP with which measurements can be made, data processed, parameters displayed and drawings of the profile presented using various options. It has a buffer of 30 measurements which can be displayed and printed at any time. The most common functions, such as recalling results, or cut-offs and starting measurements, can be accessed directly using the keyboard, while others are available by activating suitable, easy to comprehend menus. Among other things, these menus permit the presetting of tolerance thresholds which, when linked to one of the measurable parameters, facilitate series checks.
RT-10 Plus

INR 1

VIEW DETAILS
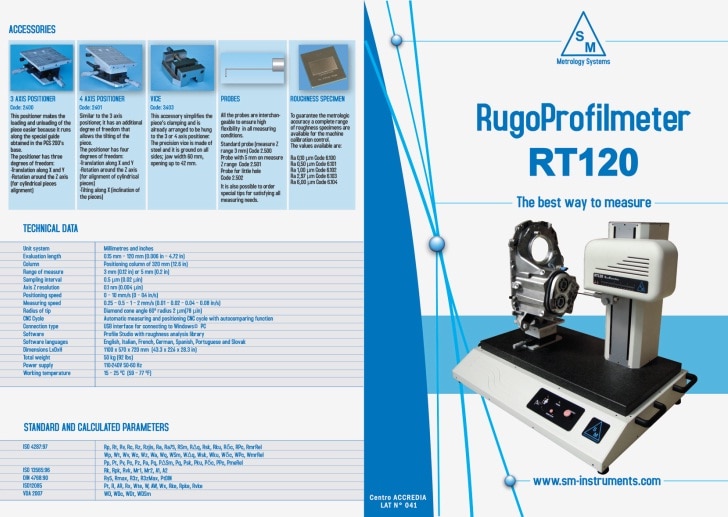
RT120 was conceived from the need to characterize roughness and micro-profiles on pieces, even complex ones, using one device, thanks to the RT120 “all-in-one” logic and Profile Studio analysis software. Profile Studio software was developed to be extremely user friendly and easy to use by the operator; all functions required for the characterization of the profile and roughness are available in the right toolbar and divided into categories, each one featuring a different colour. New dimensions and roughness analyses can be input on the same profile and displayed on the same screen, in order to allow the operator to carry out a complete analysis of the piece, with one single measurement. Thanks to the self-comparing function, it is possible to reconstruct all dimensions and dimensional tolerances of a reference profile on a new profile, thus saving a considerable amount of time for the check in series. The roughness parameters are elaborated according to the most recent standards like ISO 4287, ISO 13565-1 and -2, ISO 12085, VDA 2007 for a total of 70 parameters calculated.Parameters calculated:	 ISO 4287:09	Rp, Rt, Rv, Rc, Rz, Rzjis, Ra, Ra75, RSm, RΔq, Rsk, Rku, Rδc, RPc, RmrRel Wp, Wt, Wv, Wc, Wz, Wa, Wq, WSm, WΔq, Wsk, Wku, Wδc, WPc, WmrRel Pp, Pt, Pv, Pc, Pz, Pa, Pq, PΔSm, Pq, Psk, Pku, Pδc, PPc, PmeRelISO 13565:96 	Rk, Rpk, Rvk, Mr1, Mr2, A1, A2DIN 4768:90  	Ry5, Rmax, R3z, R3zMax, PtDINISO12085:98           	Pt, R, AR, Rx, Wte, W, AW, Wx, Rke, Rpke, RvkeVDA 2007	WD, WDc, WDt, WDSmMeasurement range in X: 	120 mm (4.72 in)Measurement range in Z:	3 mm(0.12 in) o 5 mm (0.39 in)Resolution in X:  	0.1 μm (0.02 μin)Resolution in Z:	0.1 nm (0.004 μin)Measurement speed:	0.25 – 0.5 – 1 – 2 mm/s (0.01 – 0.02 – 0.04 – 0.08 in/s)Tip sizes:	Diamond cone 60° angle 2 µm (78 µin) closing radiusTraverse length of column:	Column with a positioning of 320 mm (12.6 in)CNC cycles:	CNC automatic measurement and Positioning cycles with self-comparisonConnection:	USB interface towards Windows© PCSoftware:	Profile StudioLanguages:	Italian, French, English, German, Spanish, Portuguese and SlovenianSizes:	LxDxH1100 x 570 x 720 mm  (43.3 x 22.4 x 28.3 in)Overall weight:	50 kg(92 lbs)
RT120 Profilometer-roughness tester

INR 1

VIEW DETAILS
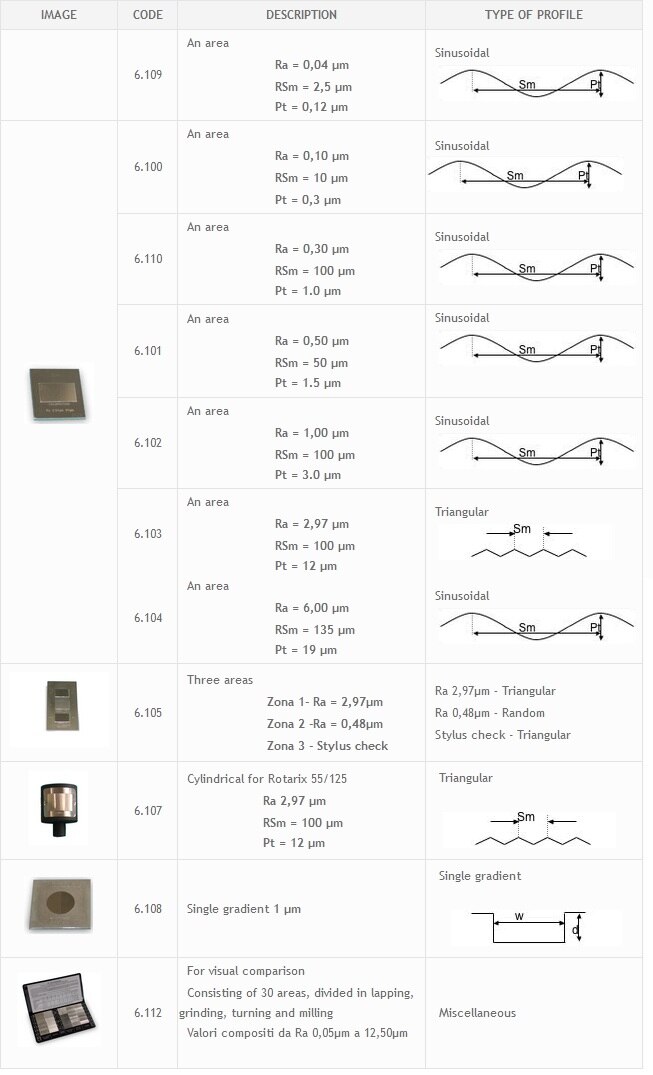
Specimens are available for calibration and the functional check of instruments, produced according to ISO 5436 standard; upon request Accredia calibration certificates are released.The roughness specimens can be used on devices with contact measurement and devices with measurements without contact, of optical type; all specimens are made in nickel. 
ROUGHNESS SPECIMENS

INR 1

VIEW DETAILS
RT10G roughness tester was born from the success obtained by RT10; easy to handle and reliable like the basic version, it also carries out advanced analyses typical of a laboratory instrument.In addition to 31 roughness parameters calculated, RT10G displays the graphs of the roughness profile, primary profile, bearing capacity curves, distribution of ordinates, and allows to set tolerances on single parameters and personalize prints. RT10G uses new generation electronics with 0.001 µm resolution that ensure always reliable results and displays them in a user-friendly fashion, thanks to the internal icon menus taken from modern Smartphones.CHARACTERISTICS:Measurement range: ±300μmResolution:  0,001 μmCut-off Lenght:   0,25 – 0,8 - 2,5 mmCut-off number:  Selectable from 1 to 5Traverse lenght:  Up to 16 mmPick-up: 	Inductive, it can be rotated of 90° for lateral measurements (with SB50 probe)Measurement parameters: 31 parameters (Ra, Rq, Rt, Rz, Rp, Rc, Rv, Rsm, Rdc, Pa, Pq, Pt, Pp, Pc, Pv, Psm, Pdc, RPc, PPc – Rk, Rpk, Pvk, Mr1, Mr2 – Pt, R, Rx, AR-R3, R3zm, Rmax)Graphs displayed: Roughness, primary, bearing capacity curve, and distribution of ordinatesUnit of measurement: Millimetres and inchesInterface: 	TFT, 2’’ colour graphic display and 4 lateral waterproof membrane buttonsLanguages: Italian, French, English, German, Spanish and PortugueseMemory: Up to 1000 measurementsAccessories: RT10G roughness tester, 110-230V battery charger, adjusting walls, 8 mm diameter end plug for connection to stand, roughness sample, Case, User Manual.Salbro Engineers represents SM Metrology Systems for their surface metrology products such as Roundness, Roughness, Contour / Profile measuring machines and accessories.
RT10G Palmtop graphic roughness tester

INR 1

VIEW DETAILS
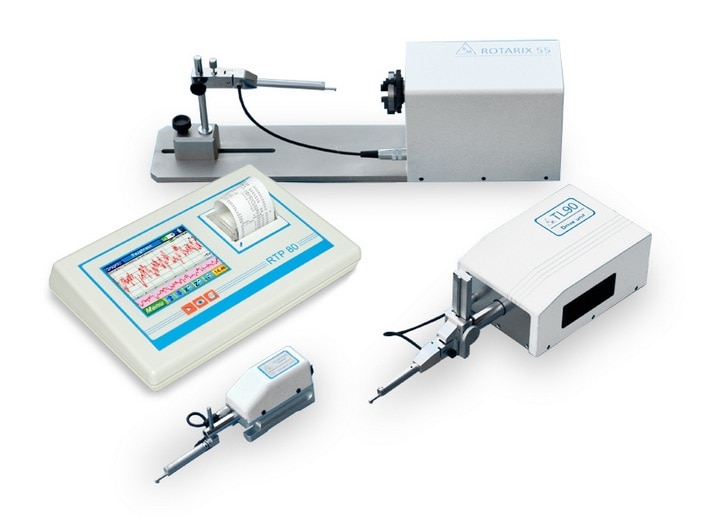
RTP80 roughness tester, easy to handle and user-friendly, allows to characterize even the most complex surfaces, easily and conveniently. The shiny 5.7’’ colour touchscreen display combined to the icon interface, allows the operator to set the measurement parameters, moving on the piece and carrying out the analysis quickly. The results obtained and the relative tolerances can be printed immediately using the thermal printer built in the instrument. The graphs and parameters are all of interactive type, to allow the operator to choose how to present the results. RTP80 is suitable for production departments, where the measurement settings for batch analyses can be protected by password, and it is also ideal to be used in metrological laboratories where statistical analyses can be carried out on the measurements taken. RTP80 calculation unit can be connected up to 4 measurement translators for various types of pieces.CHARACTERISTICS:Measurement range: ±500μm ( TL90 )Resolution:  0,001 μmCut-off lenght:   0,25 – 0,8 - 2,5 - 8 mmCut-off number: Selectable from 1 to 19Traverse lenght:  Up to 50 mm ( TL90 )Pick-up: Inductive, it can be rotated of 90° for lateral measurementsPrinter: Integrated, thermal printerMeasurement parameters:54 parameters(Ra, Rq, Rt, Rz, Rp, Rc, Rv, Rsk, Rku, Rsm, Rdc, RPc, Pa, Pq, Pt, Pp, Pc, Pv, Psm, Pdc, PPc, Wa, Wq, Wt, Wz, Wp, Wv, Wc, WSm, Wdc, WPc, Rk, Rpk, Pvk, Mr1, Mr2, Pt, Pdc, PPc, R, Rx, AR, Wte, W, AW, Wx, Rke, Rpke, Rvke, Mr1e, Mr2e Rmax, R3z, R3zm)Graphs displayed: Roughness, waviness, primary, bearing capacity curve, and distribution of Ordinates.Unit of measurement: Millimeters and inchesInterface: TFT, 5.7'' colour graphic Touchscreen display and 3 waterproof membrane buttonsLanguages: Italian, French, English, German, Spanish, PortugueseMemory:  Up to 1000 measuresAccessories: RTP80 roughness tester, Translator (TS4, TS7, TL90, Rotarix 55 or Rotarix 125), 110-230V battery charger, roughness sample, case, user manualCONNECTABLE TRANSLATORS:TS7Compact and easy to handle translator, it allows taking measurements in the most difficult conditions, by simply holding it in one hand. Maximum traverse length of 25 mmTL90Professional translator with internal metrological reference that allows characterizing W waviness parametersPositioning micrometrics on the piece, with traverse length of 110 mm, bistable nib for measurements with and without skid. Maximum traverse length of 50 mm.ROTARIX 55Rotary unit with horizontal axis for measuring radial roughness (e.g. pipes, balls) on medium-size pieces, measurement diameter from Ø3 ÷ Ø60 mm.ROTARIX 125Rotary unit with vertical axis for measuring radial roughness on bulky pieces, measurement diameter from Ø10 ÷ Ø160 mm.Salbro Engineers represents SM Metrology Systems for their surface metrology products such as Roundness, Roughness, Contour / Profile measuring machines and accessories.
RTP80 Portable roughness tester

INR 1

VIEW DETAILS
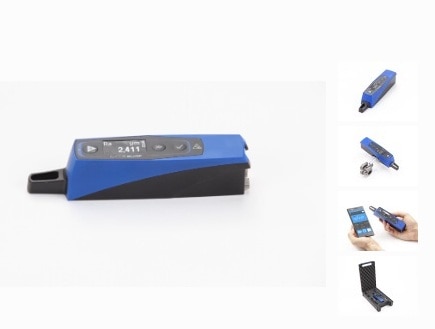
LITEsurf SM Product The new LITEsurf roughness tester was born from the forty-year experience that SM has in measuring and designing roughness tester for production areas. This is why we know well what are the characteristics that are really necessary for an instrument of this family that has to go to work there right with you: compactness, robustness, ease of use and clarity of the results, these are the characteristics that they will make LITEsurf the ideal partner for roughness characterizing on your parts. Are you considering buying a new palmtop roughness tester? We accept the challenge, because we are sure that the new LITEsurf roughness tester is a step forward compared to the other opponents! Are you not convinced? We give you 5 good reasons!Connectivity: Today technology allows us to share information quickly and easily, can your new roughness tester do it? The new LITEsurf, thanks to the integrated Bluetooth and USB connection, allows you to connect the smartphones, tablets and PCs in an intuitive and fast way, then sharing information with the rest of the world.Flexibility: you want, with a single instrument, to measure zones horizontally, vertically, up / down or sideways, many will answer you impossible, but LITEsurf can do all this. Through the probe rotatable laterally by 90 ° and to the balanced and preloaded sensor, each area of the piece can be measured.
LITEsurf Palmtop Roughness

INR 1

VIEW DETAILS
WARPsurf SM ProductThe WARPsurf is a turning point in the world panorama of the instruments for surface analysis, because it gives in a single portable instrument the capability to perform both roughness and profilometry analysis.The brilliant 7’’ touch screen display, combined with modern user interface, allows the user to become quickly familiar with the instrument, setting easily the measure parameters, positioning on the piece and performing the analysis.The instrument is equipped with a 1GHz microprocessor that allows to have a fluid system and fast processing even with complex profiles.Extremely compact and handy, the WARPsurf allows to position easily on big pieces thanks to the integrated micrometric that covers 110 mm range.Thanks to the standard USB interface, it is possible to plug a regular USB drive to save images or PDF reports; using this interface the instrument can connect to a common desktop printer and directly print on A4.The instrument can analyze surface features along with dimensional ones, thanks to the interchangeable styluses for both roughness and profilometry.
WARPsurf

INR 1

VIEW DETAILS
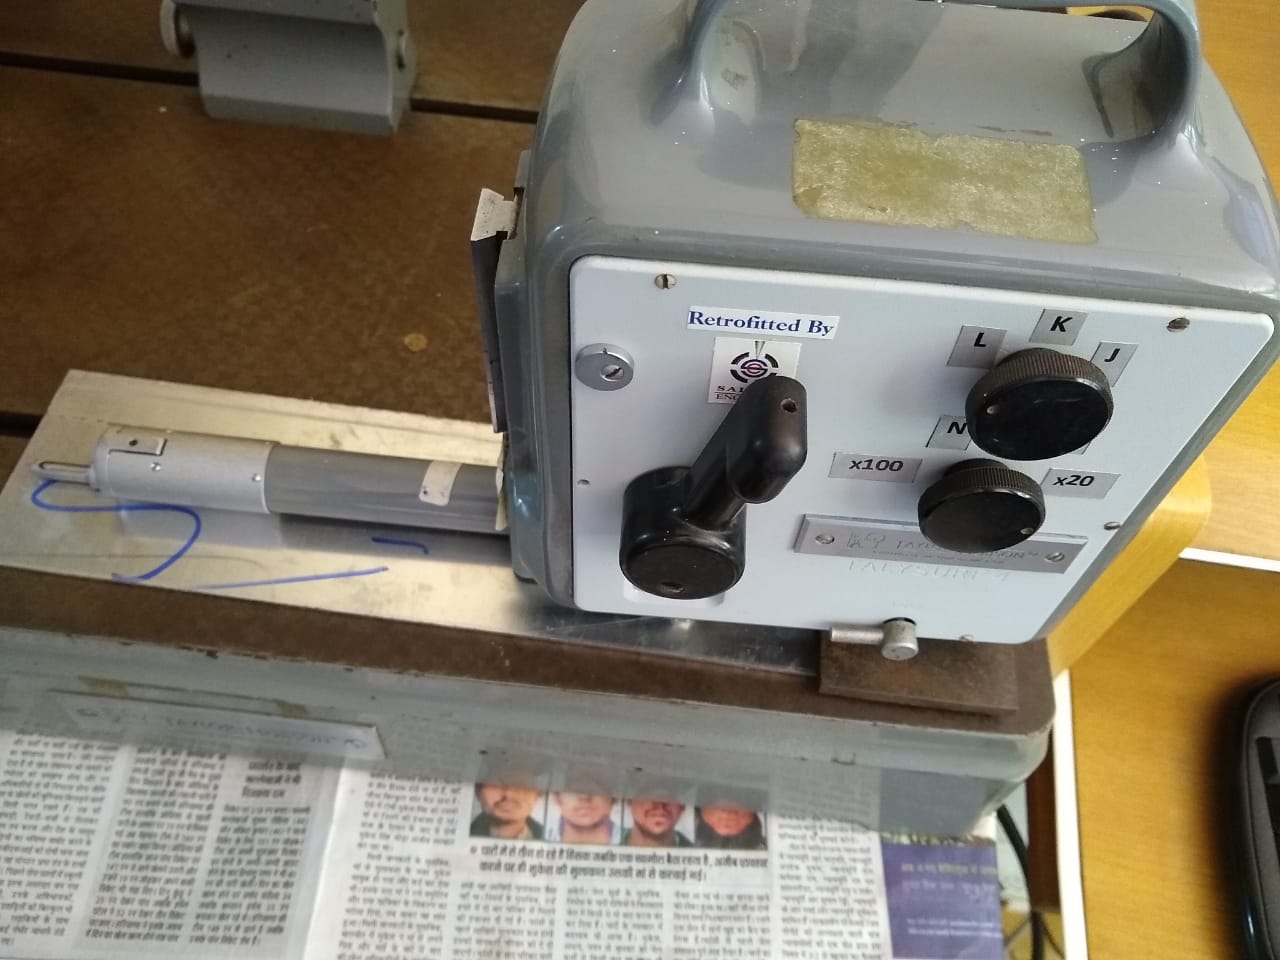
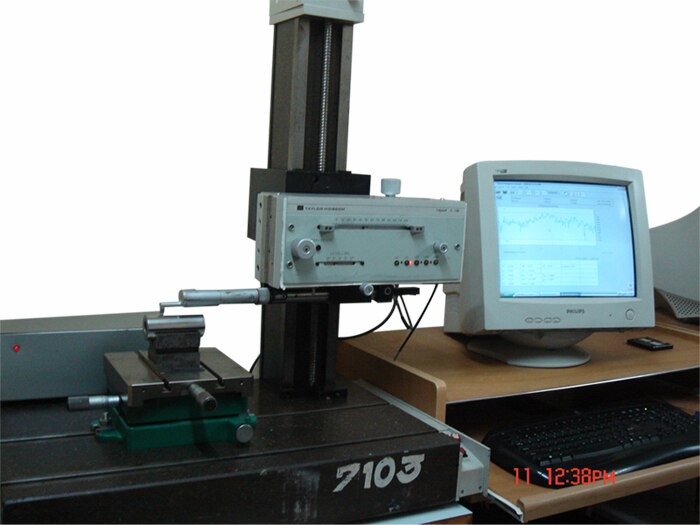
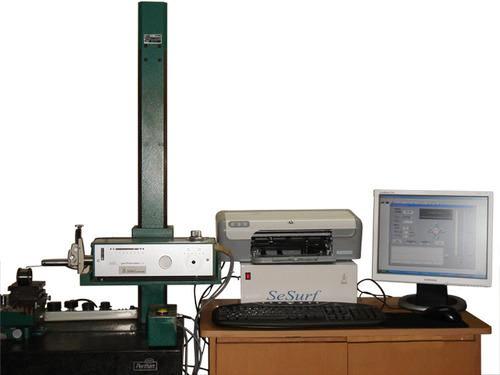
Note*-Machines displayed are Products/property of respective Manufactures.Machine Pictures used are to state compatibility of our Retrofit Packages only.Pre Owned Talysurf 5 – Retrofitted with SeSurf Ready for Immediate Dispatch•	Five Traverse Speeds 0.05mm to 2.5mm per sec•	120mm mechanical Datum Traverse for Skid & No Skid•	Motorised Column Stand•	Stylus Range: 1000 um•	Three Filter Modes: Gaussian, 2CR & 2CR PC•	Five Filter Cut Offs: 0.08, 0.25, 0.8, 2.5 & 8mm•	Analysis of Profile, Unfiltered, Roughness & Waviness•	Resolution: 0,01 / 0.001 & 0.0001μm •	Section Remove to delete un wanted data •	Hard Coded User Logo, Name, Location etc•	Five fields for entering Job details•	Specials: Auto Save, Excel Export with Statistical. Parameters & More  Talysurf5 with SeSurf computer Interface/ Retrofit is a laboratory standard with ruggedness and easy to use. The Software is User friendly but powerful. The Talysurf5 instrument maintains a high level of measurement accuracy and performance reliability, but is available at minimum capital investment. The Granite Base Tee slots are pre aligned to the Pick Up Stylus tip for easy alignment of the job under test. The Manual Column allows to measure up to 350mm above the Base surface. SeSurf allows the user to make measurements, analyze them and even re- analyze them to any other conditions and parameters at any later date in the future, thus decreasing Time and improving Productivity. Effective surface characterization requires accurate acquisition of data, coupled with appropriate analysis. Traditional measurement methods have reported only surface roughness, providing an incomplete picture of the surface texture, which comprises a matrix of complex, interrelated characteristics. SeSurf incorporates the best industry Standards for data analysis. Unfiltered profiles can be analyzed for Roughness, Waviness with cutoff wave lengths of 0.08 mm, 0.25 mm, 0.8 mm, 2.5 mm, 8 mm in 3 digital filters wiz: Gaussian, 2CR and 2CR PC (Phase Corrected). SeSurf also provides an option for data to be analyzed with a combination of both Roughness and Waviness.SeSurf provides 22 different Unfiltered Profile parameters, 26 Roughness and Waviness parameters.SeSurf’s Bearing Ratio curve enables the user to asses’ contact/area at a given depth from profile height in percentage to the assessment length. Parameters assessed are Tp1, Tp2, Htp, Rmr, Rk, Rpk, Rvk, HSC and Pc.Talysurf5 with SeSurf Retrofit Package comes with a 12 month warranty period.
Talysurf5_SeSurf Retrofit Package

INR 1

VIEW DETAILS
•	Palmtop Roughness Tester RT-10 Plus•	Technical specification•	Roughness parameters according to ISO 4287: Ra, Rq, Rt, Rz, Rc, RSm, Rmr & Rmax Special.•	4 roughness parameters according to ISO 12085: Pt, R, AR, Rx. Measuring length: up to 16 mm.•	Measurement range: ±20 µm and ±80 µm.•	Cut-off lengths: 0.25 – 0.8 – 2.5 mm.•	Gaussian filter according to ISO 11562.•	Display: 16-character, 2-line LCD.•	Touch keyboard of 4 keys.•	Rechargeable battery incorporated.•	Multi language: Italian, French, English, German and Spanish.•	Buffer of 30 measurements.•	Serial data output.•	Gauge rotable through 90° for lateral measurements.•	Resolution 0.01 µm and 0.04 µm.The portable, palmtop roughness tester RT-10 permits evaluation of the most varied roughness parameters directly on the site of production offering, in a compact package, the advantages of being easy to carry, simple to use and reliability of measurement.Designed for use on the shop floor, it is shielded against external agents by a special protective membrane. It can measure in difficult positions, including when held in the hand, in the vertical traverse position. The gauge may be turned by 90° to permit measurements in grooves or between shoulders. The 400x250 mm measurement support in black granite with adjustable steel column can be used with RT-10 to measure pieces that are bulky or difficult to position.Complete Presentation of ResultsThis instrument can be connected to the PR-10, a 24-column printer providing certification both of the parameters measured, together with indication of the tolerances, and of the profile drawing. Using the serial output line, data can be downloaded to a Personal Computer running the Remote-10 program under Windows 98/ME/NT4/2K, XP with which measurements can be made, data processed, parameters displayed and drawings of the profile presented using various options. It has a buffer of 30 measurements which can be displayed and printed at any time. The most common functions, such as recalling results, or cut-offs and starting measurements, can be accessed directly using the keyboard, while others are available by activating suitable, easy to comprehend menus. Among other things, these menus permit the presetting of tolerance thresholds which, when linked to one of the measurable parameters, facilitate series checks.
RT10 Palmtop Roughness Tester

INR 1

VIEW DETAILS
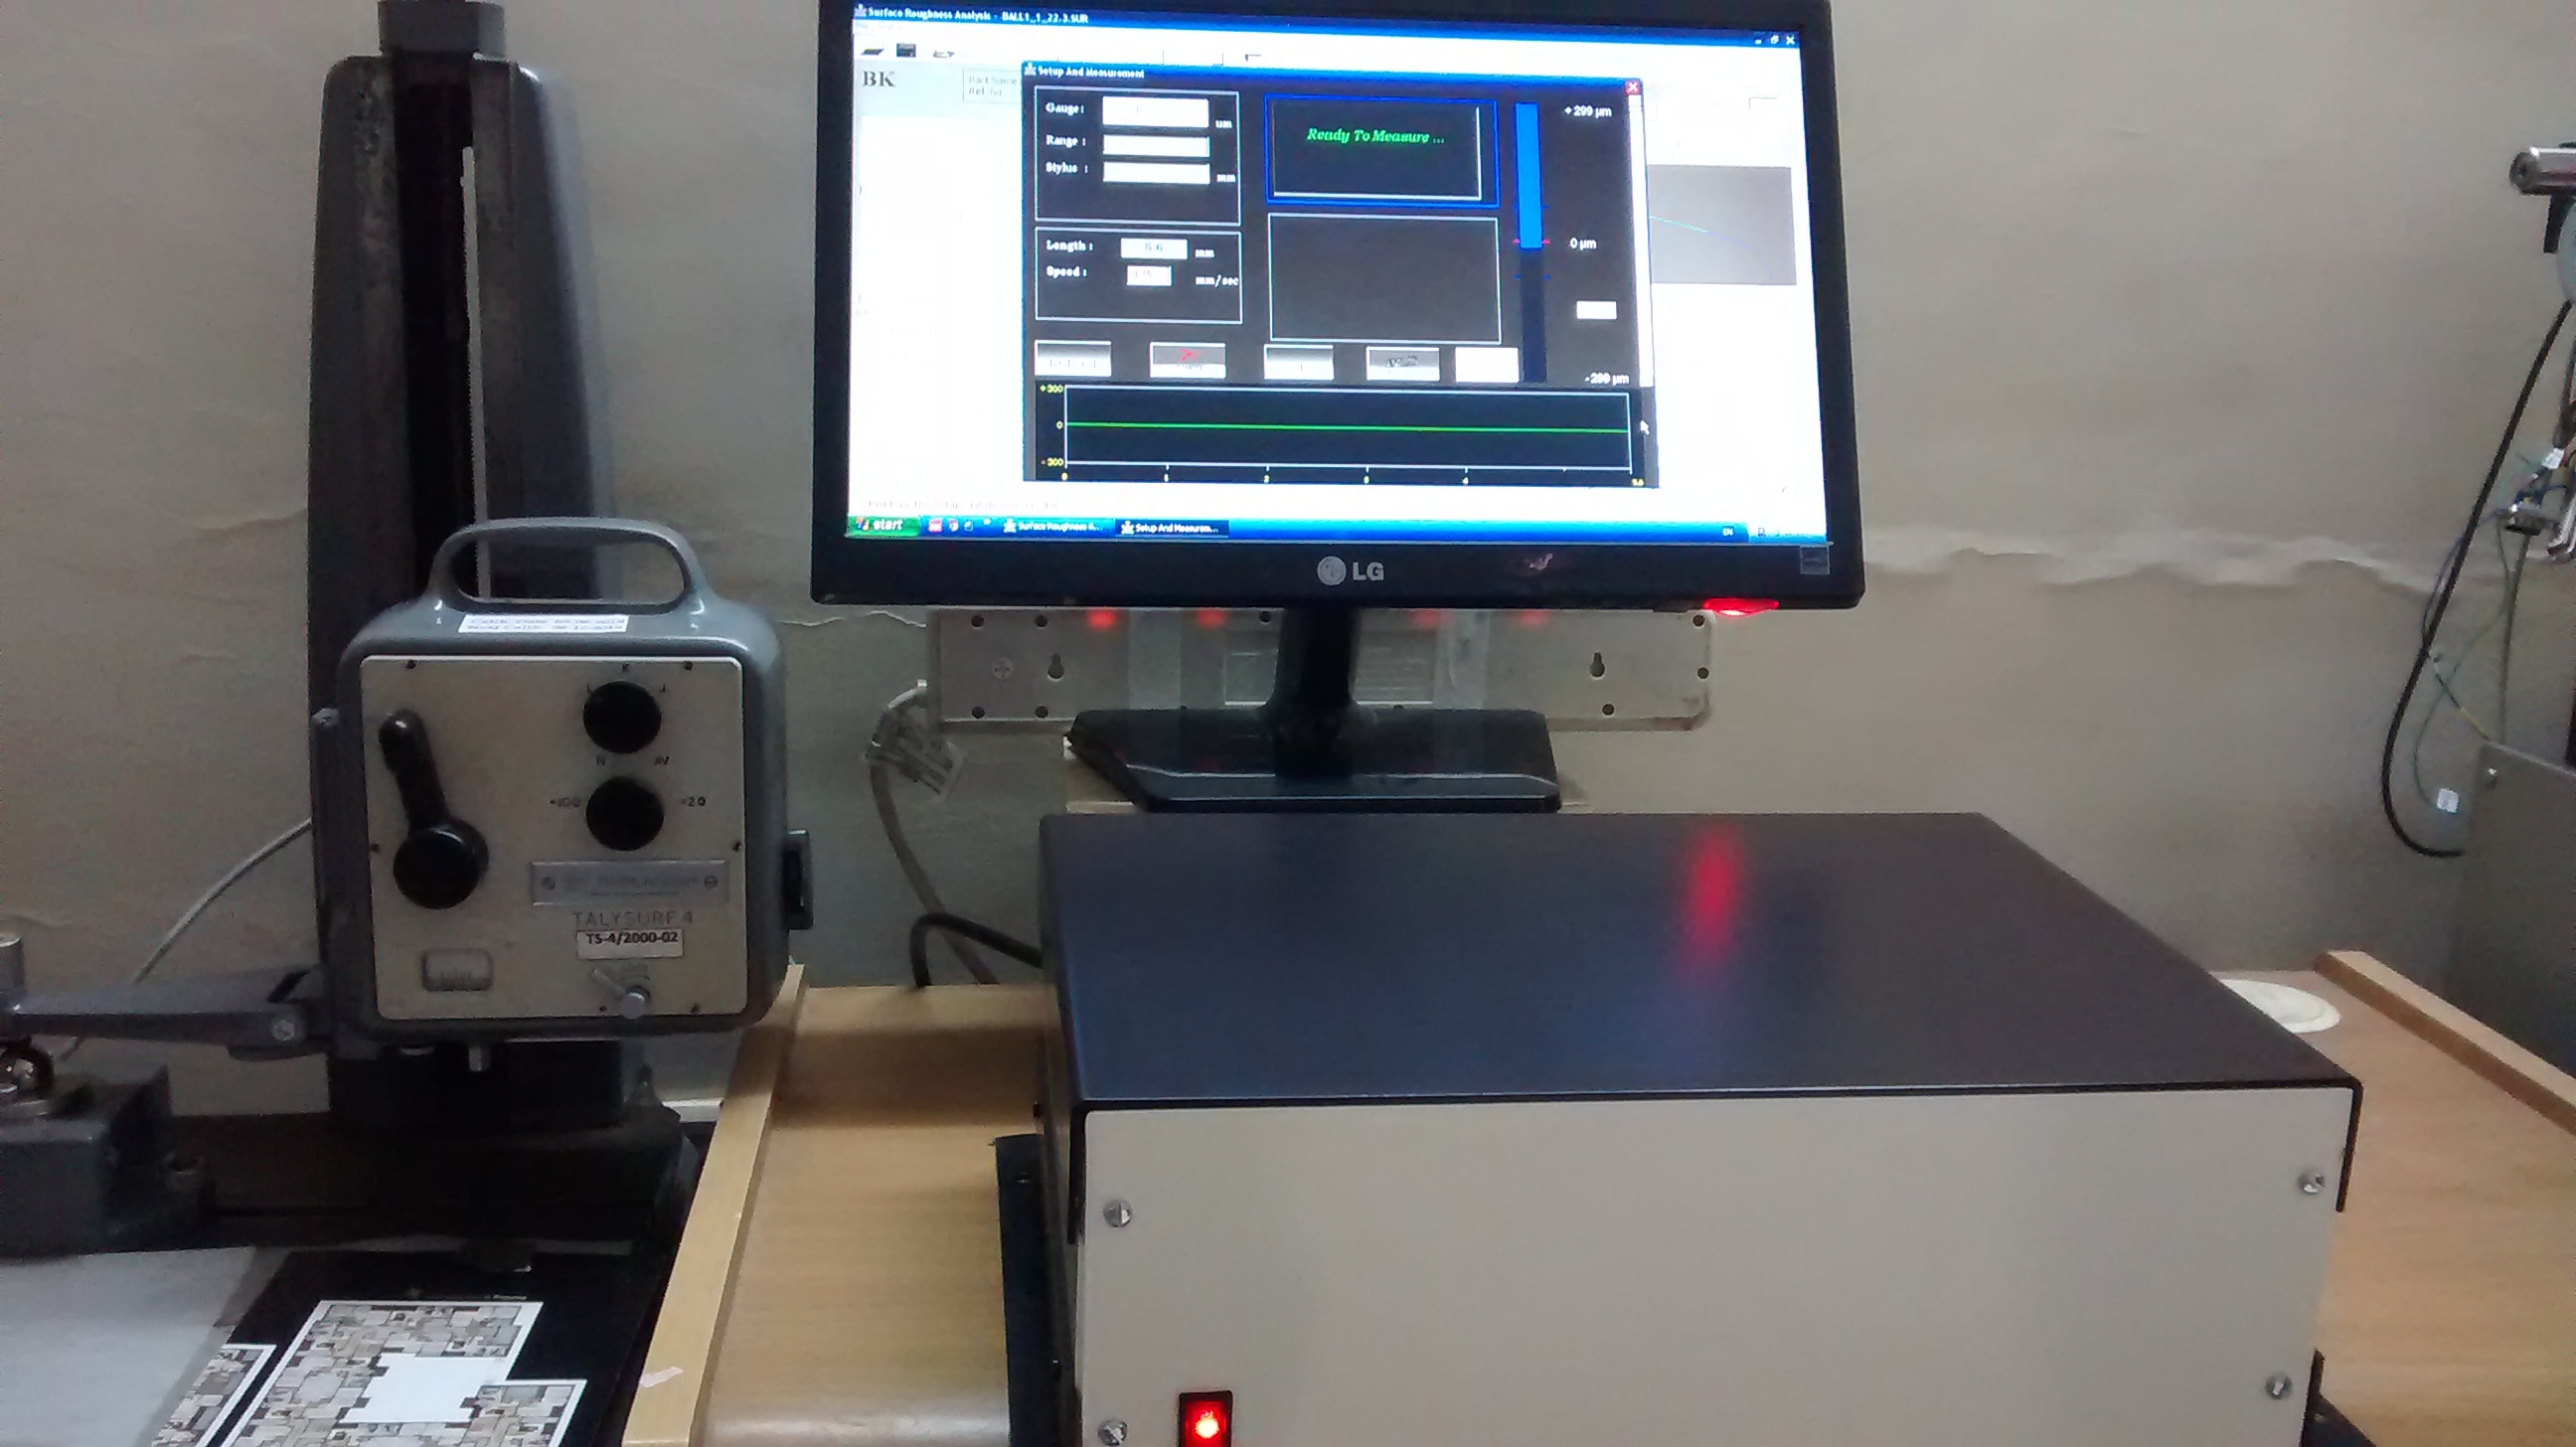
Introducing new Gauging Technology for Surface Roughness & Waviness Measurements.
Talysurf4 SeSurf Retrofit

INR 1

VIEW DETAILS
Assessment of Roller profile depth against specified axial length. This is an important parameter for Rollers & Rings in Bearings. This Parameter also gives contact area against load caring capacity.
Camber assessment Program
VIEW DETAILS

Filter using tags

Measure ComponentsMeasure Balls for RoughnessMeasure Components for RoughnessMeasurement ServiceRaRzRoughness ParameteresRoughness MeasurementWaviness AnalysisWaviness MeasurementRoller Camber MeasurementRoller Camber Analysis programRoller Camber AssesmentelectionVoting MachineDigital VotingCandidateselectronic votingElectronic Voting MachineEVMVoteElection voting MachineCo-Op Bank ElectionRoughnesssSurface RoughnessPalmtop RoughnessSurface MetrologyRoughness Testersurface analysisPortable Roughness TesterWARPsurfroughness parametersRoughnessWavinessDominant wavinessMaterial ratio curve (bearing)height amplitude distributionroughness averageroundnessConcentricityParallelismCylindricityDiameterPerpendicularityThickness variationNew Roundness and Cylindricityroundness testerRoundness Measuringroundness measurementCylindricity measurementStraightnessbearing ratio curveraunfiltered profileGaussian Filter2CR filterDigital filtersMachine controlPre-owned MachinesRetrofit PakageSurface Roughness & Waviness Retrofitsurface roughness retrofitAnalysis softwareAnalysisRoughness AverageRetrofitBearingRadial PlayRadialEmbeddedADCPlunger ProbeBearing Radial ClearanceData Logger SystemEmbedded systemEmbedded codingLan Remote ConnectRollersRingsBearingsCamberMeasurement ServicesCalibrationContour MeasurementContour Machine CalibrationCalibrateCAD programCAD functionsRoundness Teste Retrofit PackageLaboratary Roundness TesterUpgraded SoftwareFlatnessRelative EccentricityeccentricitysquarenessVelocity AnalysisHarmonicsAxial RunoutRadial RunoutRtBallsPortableContourTalysurf5120mm TraverseRetrofitted machinesSeSurf Retrofit PackageOn SaleSurface FinishRoughness Meanlarge Size Bearings measurementForm Measurementturbines measurementcompressors measurementRoundnessCylindricity with RoundnesscoaxialityspherocitySKF Waviness Analysistotal run outrun-outPortable RoughnessTalysurf4Transperant, Reliable, RobustLinear GraphFFT algorithumLSCMICMCCMZCSpecimen hemisphereGuizzo specimenSpecimen cylindercalibrate sensitivityGlass HemisphereMaster CylinderSoccerTrainerGoal Keeper TrainerFootball Trainer machinefootballTrainlinearitycylindricityconicityconcentricityparallelismthickness variationLabortary Roundness TestercontourProfile Studio softwareElectionVVPATEVM RentalsEVM for HireEVM on RentSoccer Trainerunmanned systemfootball practiSurface Parallelismharmonicsdata accusitionBest Fit CurveBest Fit LineSlope RemovalProfilometersAutomatic CNC positioningAutomatic CNC measuringPortable Surface Roughness TesterTransparent ResultsElectronic Votingvotemultiple votingnon tamperableEVM manufacturerElection voting SystemVoting SystemsFlatnesssParkingParking SolutionsParking managementUnmanned Parkingparking lotParking assistanceVotingVoting CenterVoting BoothMultiple VotingTalyrond 252SeRoundISO standardsISO 13565-1Radial ClearanceBrearing PlayDataloggerLog DataMultiple Category Votinglarge Size Bearingslarge size bearingsCylindricity With RoundnessMulti Profile PlotWave Amplitude ControlcamberHeight
Measure Components |Measure Balls for Roughness |Measure Components for Roughness |Measurement Service |Ra |Rz |Roughness Parameteres |Roughness Measurement |Waviness Analysis |Waviness Measurement |Roller Camber Measurement |Roller Camber Analysis program |Roller Camber Assesment |election |Voting Machine |Digital Voting |Candidates |electronic voting |Electronic Voting Machine |EVM |Vote |Election voting Machine |Co-Op Bank Election |Roughnesss |Surface Roughness |Palmtop Roughness |Surface Metrology |Roughness Tester |surface analysis |Portable Roughness Tester |WARPsurf |roughness parameters |Roughness |Waviness |Dominant waviness |Material ratio curve (bearing) |height amplitude distribution |roughness average |roundness |Concentricity |Parallelism |Cylindricity |Diameter |Perpendicularity |Thickness variation |New Roundness and Cylindricity |roundness tester |Roundness Measuring |roundness measurement |Cylindricity measurement |Straightness |bearing ratio curve |ra |unfiltered profile |Gaussian Filter |2CR filter |Digital filters |Machine control |Pre-owned Machines |Retrofit Pakage |Surface Roughness & Waviness Retrofit |surface roughness retrofit |Analysis software |Analysis |Roughness Average |Retrofit |Bearing |Radial Play |Radial |Embedded |ADC |Plunger Probe |Bearing Radial Clearance |Data Logger System |Embedded system |Embedded coding |Lan Remote Connect |Rollers |Rings |Bearings |Camber |Measurement Services |Calibration |Contour Measurement |Contour Machine Calibration |Calibrate |CAD program |CAD functions |Roundness Teste Retrofit Package |Laboratary Roundness Tester |Upgraded Software |Flatness |Relative Eccentricity |eccentricity |squareness |Velocity Analysis |Harmonics |Axial Runout |Radial Runout |Rt |Balls |Portable |Contour |Talysurf5 |120mm Traverse |Retrofitted machines |SeSurf Retrofit Package |On Sale |Surface Finish |Roughness Mean |large Size Bearings measurement |Form Measurement |turbines measurement |compressors measurement |Roundness |Cylindricity with Roundness |coaxiality |spherocity |SKF Waviness Analysis |total run out |run-out |Portable Roughness |Talysurf4 |Transperant, Reliable, Robust |Linear Graph |FFT algorithum |LSC |MIC |MCC |MZC |Specimen hemisphere |Guizzo specimen |Specimen cylinder |calibrate sensitivity |Glass Hemisphere |Master Cylinder |Soccer |Trainer |Goal Keeper Trainer |Football Trainer machine |football |Train |linearity |cylindricity |conicity |concentricity |parallelism |thickness variation |Labortary Roundness Tester |contour |Profile Studio software |Election |VVPAT |EVM Rentals |EVM for Hire |EVM on Rent |Soccer Trainer |unmanned system |football practi |Surface Parallelism |harmonics |data accusition |Best Fit Curve |Best Fit Line |Slope Removal |Profilometers |Automatic CNC positioning |Automatic CNC measuring |Portable Surface Roughness Tester |Transparent Results |Electronic Voting |vote |multiple voting |non tamperable |EVM manufacturer |Election voting System |Voting Systems |Flatnesss |Parking |Parking Solutions |Parking management |Unmanned Parking |parking lot |Parking assistance |Voting |Voting Center |Voting Booth |Multiple Voting |Talyrond 252 |SeRound |ISO standards |ISO 13565-1 |Radial Clearance |Brearing Play |Datalogger |Log Data |Multiple Category Voting |large Size Bearings |large size bearings |Cylindricity With Roundness |Multi Profile Plot |Wave Amplitude Control |camber |Height

Have any question or need any business consultation?

Have any question or need any business consultation?

Contact Us